Open your machine terminal and start with installing smb client using yum
Command: yum install samba-client
Now to use CentOS as a client we must have another machine which acts as a server for our machine I choose Windows 7 you may choose another OS, a little bit of steps may change but the concept is the same almost.
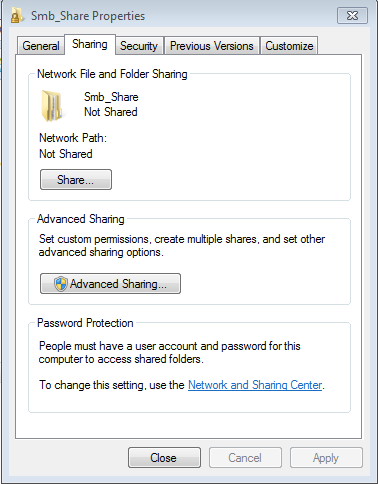
Now in windows create your shared folder and assign the permission according to your purpose.
I created a folder inside my c drive named Smb_Share, then just right-click to properties to share the folder.

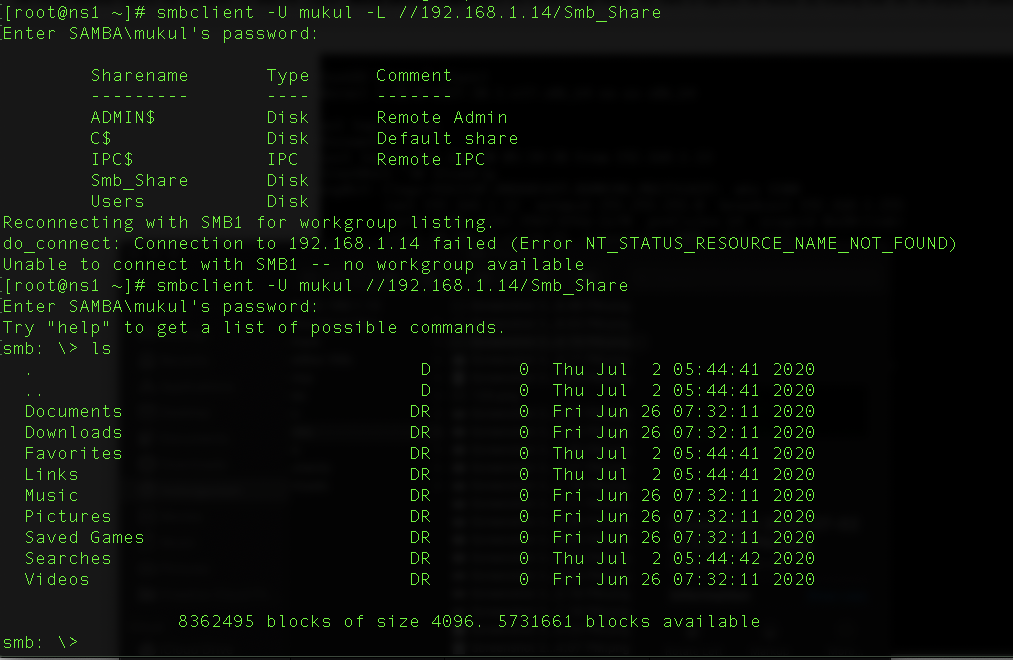
Now get back to your Centos Machine and type this command in terminal. smbclient -U mukul -L //192.168.1.14 where -U is for user and -L is for host


After knowing the folder name now we can directly access the folder using command smbclient -U mukul //192.168.1.14/Smb_Share

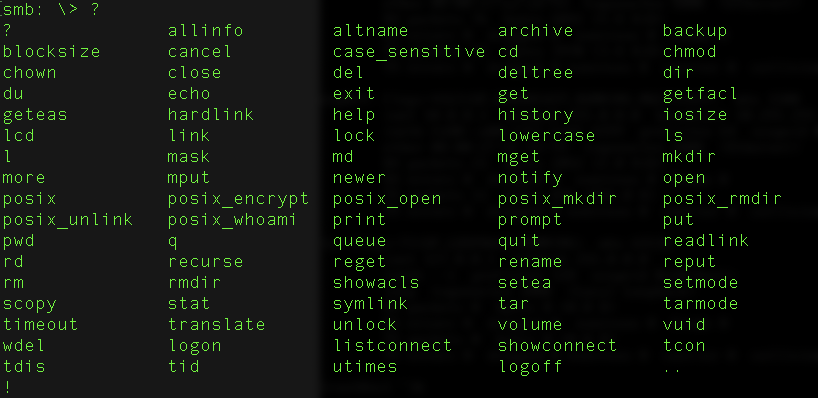
After getting inside the machine use “?” command to know different commands

use get command like get filename to download any file to our system and the important thing is that file downloaded inside the directory from which you make a connection like here I make a connection from /root directory so all file downloaded inside this directory.
if you have write permission then you can also use the mkdir command to make a directory inside the shared folder here I create a demo directory.


Use can use the “mget” command to download multiple files from smb client.“Lcd” command is used for seeing current directory list like ls command in terminal.
“put” command is similar to get command but instead of downloading it upload the file to the server. And for multiple files use “mput”(m=multiple).
“del filename” command is used to delete the file “deltree Pictures\desktop.ini ” commands helps to delete the desktop.ini file so with deltree we can delete the directory inside the file.
“Smbget” command if you know the file name then without making the whole connection you can use smbget to directly download the file. As shown in the image.
smbget -U mukul smg://192.168.1.14/Smb_Share/iecompat.dll


All these methods are good only when your interaction with the shared folder is limited or maybe one or two times a day but what will happen if your interaction with the shared folder is on regular basis therefore sometimes network administrator mount the shared folder on system to make it easier for all to access it and sometimes users are not such qualified in all the things to make it accessible for all time. So the only solution remained to permanently mount the folder to the user system.
Before mounting we must know about Common Internet File System (CIFS) which is a network filesystem protocol used for providing shared access to files and printers between machines on the network. A CIFS client application can read, write, edit, and even remove files on the remote server.
To download it use: yum install cifs-utils
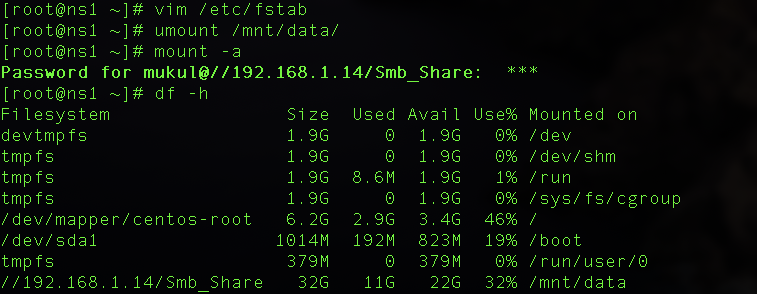
Now to mount : mount -t cifs //192.168.1.14/Smb_Share -o user=mukul,password=123 /mnt/data


where the user is mukul and password is 123, -t type of file system which is cifs, the Smb_Share folder is mount to the /mnt/data folder. To verify it use the command: df -h
Now navigate to /mnt/data to the folder to see the mounted shared folder


The last thing remaining is to permanently mount the shared folder.

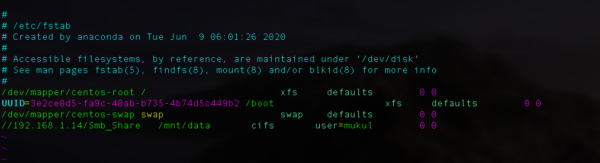
vim /etc/fstab use this command to open fstab file and edit this file like I showed in the above image. Here I use vim text editor you can use anyone and also you can add password just right to user=mukul but I choose not too. then just save and exit. type mount -a command to crosscheck. after this, if the machine restarts, the mounted folder remains mounted.

Configuring the samba(smb) on CentOS 7 and using the windows machine as a client.
Start with installing a package for samba: Yum install samba*
2. Create the shared folder and put the data inside it, which you wanna share. Gives permission to that folder according to your need. Like I create smb_data folder with permission 777 in a recursive manner but I suggest you to use 775 permission chmod -R 0775 smb_data/ just crosscheck with ls -lha command


3. Add the users which you want to access the data like I create smbuser1 then create its password and smbpassword for security purposes. For more users, you can make a group of people and add members to this group and assign permission accordingly.


4. Now the main step is to edit the smb.config file inside /etc/samba/smb.conf using any text editor add these lines as shown in the image.
[data]
comment = smb_data
path = /root/smb_data
public= yes
writable = yes
user list = smbuser1

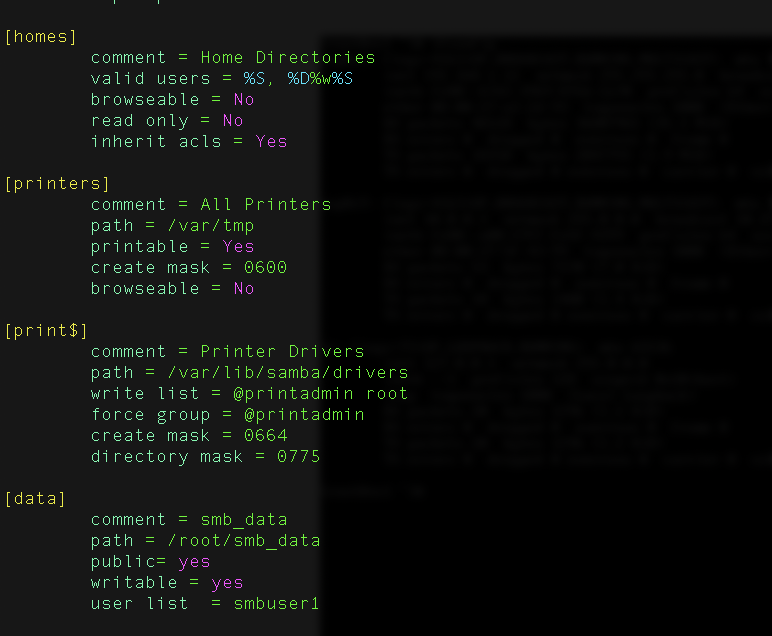
here path decides the path of our shared folder, public=yes means available to people inside the network, writable means giving write permission, and user list the users which can access this shares folder.
5. Allow the port to make a connection with Windows machine you can use firewalld but I mostly prefer iptables so I edit vim /etc/sysconfig/iptables and allow 445 port then restart the iptables service using systemctl restart iptables.service and to check whether the port is open or not use iptables -n -L command
6. Just restart the smb service systemctl restart smb.service
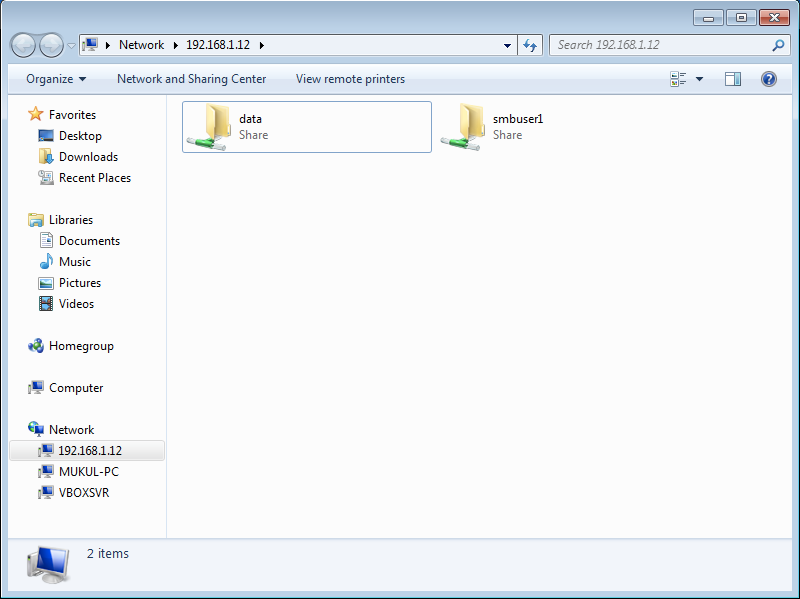
7. Now on client windows machine use run to access the shared folder by typing IP of centOS server \\192.168.1.12 and authenticate the smbuser1


8. Now the most important step Enjoy because smbuser1 is here….


No comments:
Post a Comment